Managing events
Events are the core unit of work in RaceRanger. Each event represents a race weekend or competition and contains one or more races.
Creating a new event
You create events on the web.
- Choose Organizations in the top bar and open the Events tab.
- Choose + Event.
- Fill in the steps, then choose Create event:
- Basics — the Event name.
- Location — search for the city or venue and pick it from the results. The race times follow this place's time zone.
- Dates — the Start date (today or later) and End date.
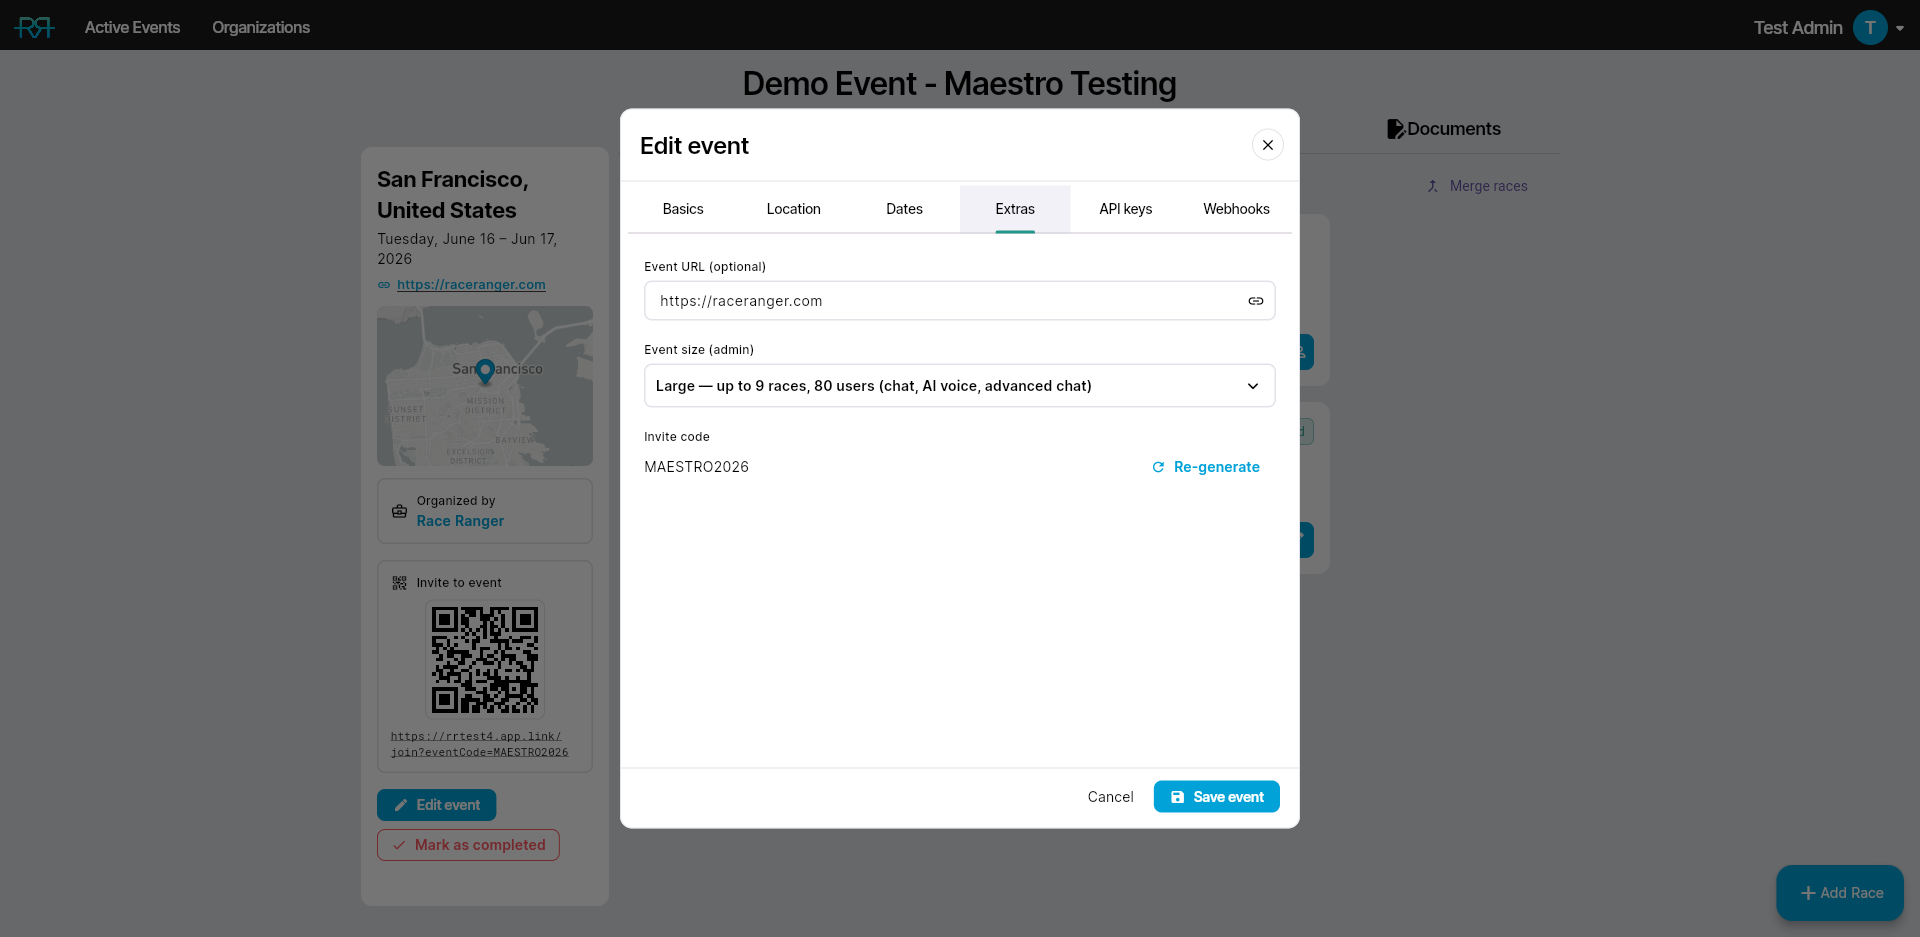
- Extras — an optional Event URL and the Event size (see below).
The event uses one of your organisation's credits for its size. If none are left, the app says so; ask RaceRanger to add credits.
If your organisation imports events from a timing system, + Event opens a search instead; see Full details below.
Event size and features
The event size decides how many races and users the event can have, and which extras it gets. The size picker shows each size's current limits:
| Size | Races | Users | Chat | Custom chats | AI voice |
|---|---|---|---|---|---|
| Small | up to 3 | up to 10 | ✓ | ||
| Medium | up to 6 | up to 20 | ✓ | ||
| Large | up to 9 | up to 80 | ✓ | ✓ | ✓ |
- Custom chats — chats you create yourself, on top of the role-based ones.
- AI voice — voice commands and AI reports for officials.
These features switch on or off with the size; there's no separate toggle. Crew members don't count towards the user limit.
An organisation admin changes the size later on the event editor's Admin tab. That gives back a credit of the old size and uses one of the new size. If there's no credit for the new size, the app says so and keeps the old size.
Ongoing and completed events
An event is ongoing until someone marks it as completed. On the web, open the event and choose Mark as completed in the left column. Stop all races first; the app won't complete an event while a race is active.
When an event is completed:
- it disappears from the phones' events lists and moves to Past events on the web;
- officials get your feedback questions;
- people who joined your organisation only through this event leave its Pending list;
- athlete check-in closes and crews can no longer be created.
Changed your mind? Mark as ongoing reopens the event.
Event documents
Attach PDF documents (competition rules, briefing notes, emergency procedures) so every official can read them in the app — details in Event setup.
Full details
Everything below is optional reading — open a section when you need it.
Importing events from your timing system
If your organisation has event import enabled, + Event on the Events tab opens Add event from import. Search for an event by name and import it. The search marks events you've already imported so you don't import the same one twice.
You can select more than one result before importing to combine them into a single event — the first is the main event and the rest are merged into it. If the event you want isn't in the search, choose Add manual event to enter it by hand.
An imported event is a Large event and uses one Large credit. When your organisation has none left, the import is refused.
If the import can't work out where the event takes place, the event editor opens on Location straight away. Pick the place and save, so the imported race times show at the right local time.
If new races are added to the timing system after you've imported an event, open the event editor's Admin tab and choose Reimport / fill missing races to pull them in. For events combined from more than one source, this refreshes every linked source. Races you already have are left untouched. To pull in the races of another timing-system event, enter its event id under Add another source and choose Add & import.
The Edit Event tabs in detail
Open the event from the events list and choose Edit event in the left column of the event detail page. A modal opens with the same fields as the create-event flow, organised into tabs: Basics, Location, Dates and Extras; API keys and Webhooks when your organisation has API access; and Admin for organisation admins. Changes take effect immediately for all assigned users after Save event is tapped.
If the event's place isn't on the map yet — for example, an imported event — the editor opens on Location. Search for the place and pick a result before you save, so the race times show in the right time zone.
The Extras tab holds the event URL, the invite code (which officials and other staff use to join the event) and the athlete check-in switch.
The Admin tab is where the event size tier lives — that one setting controls how many races, users, chat, and voice features the event has. (A new event picks its size on Extras.) Crew mode, with its minimum age and member limit, and re-importing the event from the timing system are here too. Global admins also see Keep this event open: the clean-up of ended events then leaves its participants in the organisation's Pending list.
The API keys tab manages event-scoped keys for connecting external tools to live race data — see API authentication.
The Webhooks tab lets external systems receive live event updates (penalties, incidents, race status changes) — see Webhooks.